Instrument panel ideas

This is another area which requires a lot of decision making and planning: now that the cockpit framing is well under way (reminder: the SimSamurai CS-1 Stallion), I have started thinking about the instrument panel.

The plans for the CS-1 Stallion include (obviously) the exact dimensions of the panel available to me. They also show an example layout, but of course, it’s up to me to actually decide on the various components and their layout.

The SimSamurai approach to instrument panels is to use one or two embedded LCD panels for the primary (and perhaps secondary) flight instruments — this has the benefit of keeping the instrument panel flexible, since it is just rendered, rather than having fixed instruments in fixed positions. Since I want to try various different aircraft, this is an important point. Therefore, anything like the VRInsight u-ProPit is not going to be a good choice for me. Of course, having your primary instruments rendered on an LCD in front of you pushes the experience more towards “pretend” and away from “real”, but it’s a trade off I’m happy with.

With the basic instruments covered — all I need is an LCD monitor — the next decision is to choose avionics and panels to add around it. In the back of a closet I already have some Saitek gear: Yoke, throttle, rudder pedals, radio panel and switch panel. So, flight controls are covered, and I don’t want to throw away the two panels I already have. So, the plan is to add more Saitek panels, and make up what’s missing using equipment from Desktop Aviator, VRInsight, and GoFlight, as needed.

Current inventory:

  • 19″ LCD for primary flight instruments: I will use this to display the regular 2D panel from FSX, or perhaps upgrade to a slightly larger one
  • Two Saitek Radio Panels: Each one has two radios, so I will configure them as follows for my typical VFR flights:
    • Radio 1 = COM1 and NAV1
    • Radio 2 = DME/ADF and Transponder

saitek-radio-panel

  • One Saitek Switch Panel: This has the “keys”, main electrical switches, and landing gear. The new 2620 Cessna Switch Panel from Desktop Aviator looks nicer, but that would mean losing the gear control and losing some consistency in the look of the panel, but it’s not totally ruled out at this point…

saitek-switch-panel

saitek-multi-panel

  • One GoFlight Student Pilot Module. I just acquired one of these on eBay for a really good price: not sure what I will do with it yet (or, in fact, what it can be used for).

system_student_pilot__3_grande

Wish List:

These items are high on the wish list:

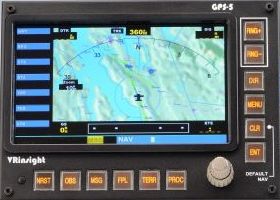
  • The GPS-5 GPS Panel from VRInsight: a little pricey perhaps, but it looks really nice. I’m a bit concerned that it will be hard to flush mount into a panel: it looks like it’s designed to be used standalone. The 2450B GPS Panel from Desktop Aviator is designed for mounting in a panel, but I like the look of the GPS-5 more.

opt1

Module_GF-ATC_-_2_grande

Also up for consideration:

  • Saitek’s BIP or some other warning light panel (GoFlight has one too)
  • Saitek’s Instrument Panel … a couple of these could be used to provide instruments not covered on the main instrument LCD — not sure exactly what, but it would be nice to have the option.

I tried to create a very quick & dirty layout by just placing a few images on a background, and came up with the following. Although the panels are very roughly in the right proportions, I haven’t checked if this actually fits in the panel space available: that will be the next step…

design2

So overall, a lot of work to be done (and a lot of USB connections needed)! It will be interesting to see how my final result compares to the ambitious plans I had at the beginning…

Catch-up post #2 – Basic PC hardware choices

Once the basic cockpit concept was selected, I moved on to building a PC to run the simulator. After reading the UGTAFS and other sources, I decided to use either FSX or Prepar3D over X-Plane, FS9, or anything else, mainly because:

  1. Various sources recommend FSX for low level VFR flight because of its improved visuals, whereas FS9 is great for high level IFR (in very general terms).
  2. FSX is now basically Prepar3D, so that means continued support and improvement (hopefully).
  3. I already had a copy of FSX, so I could use to begin with, and upgrade to Prepar3D later if it seemed worth while.

This helped narrow down some of the hardware choices: this was going to be a dedicated flight sim PC so it didn’t need to have features that FSX would not be able to utilize. It took lots of searching on sites such as newegg and TigerDirect but I finally narrowed the shopping list down to following. (Since I ended up ordering from newegg, I’m including links to their listings for each item).

Motherboard:

This motherboard was looked like it had plenty of PCI expansion space, plenty of room for memory modules, and lots of stuff (like WiFi) built right in. I also liked the look of the little control panel that shows overclock speed, CPU temp, fan speeds, etc. I figured I could run that to the instrument panel in the cockpit for extra geek points. The BIOS also looked very advanced and would help a newbie like me experiment with overclocking the CPU and RAM, if needed.

CPU:

Choosing a CPU seemed like a very important choice; there are lots of web sites that will tell you that adding more cores will make no difference to FSX (since it was written before multi core CPUs were common), so a quad core seemed perfectly fine. And, although there are newer CPUs than this now, this one had the best basic clock speed – the all-important factor for FSX.

Memory:

Fast memory apparently helps. I went with these modules, because it again seemed like a good balance between speed and price. Also, although 16GB seems like not much these days, for FSX it would be more than enough.

Graphics:

OK, so I admit to knowning very little about graphics cards; I’m not a PC gamer and it has been many years since I had to select a graphics card. So I based my decision on a few factors: Avoiding models known to be slow with FSX; Skipping anything like SLI, which is also known to make things worse, not better; Not overspending on GPU power, since FSX is almost always limited by CPU power. I also wanted something a little “more” than FSX could handle, since if I actually went with Prepar3D, then future releases might use more of the GPU than it does today (but that’s total speculation on my part).

Case:

I wanted a case that would let me add tons of fans, LED lighting, be easy to carry (since I may have to shuttle between the garage and the house), and have a cool clear side just for the looks (yeah, I know it will be mostly out of sight when in use, but sometimes you want just a little style!). It also needed to have lots of space inside for a big GPU card. I also addedtwo additional fans for the top of the case, with red LED lighting. These matched the one rear and two front fans already in the case.

Note: I considered the pros and cons of water cooling, but in the end it looked like regular air cooling would be just fine; we’ll see if that’s true in practice later on. With five fans and a temperature display on the case, I felt pretty safe for the time being.

Storage:

  • Samsung 840 EVO 500GB SSD
  • Seagate 1TB HDD

I went with an SSD over HDD for installing both Windows and the simulator itself purely for the performance benefits, there seemed no point going with a hybrid solution, mucking about with disk partition layout, etc, when SSDs are so cheap these days. 500GB sounded like way more than enough for that. And if ever I needed extra space, I added the HDD as a second drive just in case: unlikely, but it seemed easier to just throw it in now rather than open the case again later.

Power supply:

  • Antec High Current Pro 1300W

I picked a power supply by asking someone at Fry’s what I would need. There are plenty of “calculators” on the web that would tell me what to buy, but they all came out with slightly different answers, so it just seemed easier to go to retail and pick. I wanted something big enough I would not have to worry about power issues.

Display:

At this point, the choice of display was still open: plug multiple monitors to the graphics card? use a Matrox Triplehead? Use a projector for the scenery? For the time being, attaching a small 15″ monitor was enough to prove everything was working, so I left it like that.

Putting it all together:

This was the first PC I had actually built from components, so it was a bit of a learning game. Just getting the CPU and motherboard working was a little trickier than I had assumed, but the motherboard had a great little two-digit LED display built in which would show an error code if anything was wired up wrong. I also found it important to read the manual from start to finish before doing anything, since it was not laid out very logically, and important information about any of the steps would appear in different chapters. But after a little trial and error, it booted up to the BIOS. After that, I installed Windows 7 Pro x64, and then added the rest of the components, one by one, with plenty of reboots, driver updates, etc.

By the time I had finished, I had spent about $2000; a little more than I originally guestimated but less than buying something prebuilt . The end result looked pretty awesome, and gives a great “Windows Performance Index”, but the real test was still to come: FSX frames per second! That would prove whether or not the hardware choices were the right ones or not.

20150616_102616 20150616_102459_LLS 20150616_102349 20150616_101946 20150616_101751